“Anitsuku,” a comprehensive event that conveys animation creation methods, human resource development, and market know-how to the next generation of aspiring animation creators and animation fans, was held online from September 25 to 27, 2020.
This article reports on “Animation/Shot Work in the Netflix Animated Film ‘Altered Carbon: Resleeved’” by Tanaka Tsuyoshi and Miyama Kazuo from ANIMA Inc.
Anima also exhibited at this year’s “Anitsuku 2021”, where they held a session titled “The Importance of Creating a Worldview from the Netflix Animated Film ‘Altered Carbon: Resleeved’ and the Debut Experience of a CG Animator as a Feature Film Director”, with a different perspective.
Tanaka Tsuyoshi is the Animation Department Manager and Miyama is the Compositing Supervisor. In this presentation, Tanaka explained the animation of “Altered Carbon: Resleeved” and Miyama explained about light photography and compositing.
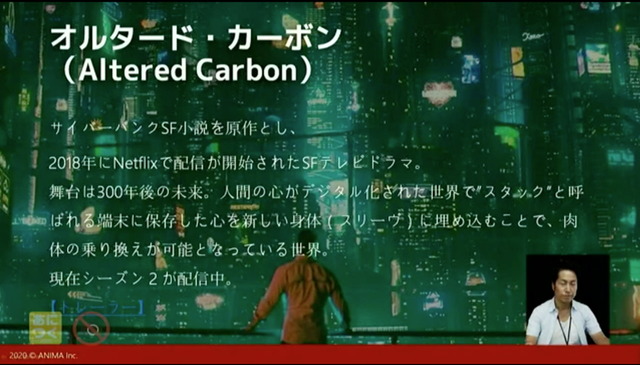
First, Tanaka gave an overview of the film. “Altered Carbon” is a live-action original sci-fi series created by Netflix, and the Netflix animated film “Altered Carbon: Resleeved” is a spin-off animation.
It depicts a world where the human mind has been digitized and can be backed up in a device called a “stack,” and death can be avoided by reassembling it into a body called a “sleeve.”
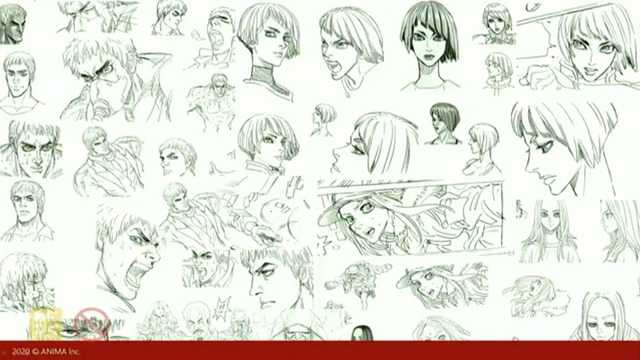
Tanaka introduced the keywords set forth by the film’s director, Nakajima Takeshi. He said that six keywords were important for the production of the film: hard-boiled, physical action, near future, character design by Otagaki Yasuo, yakuza and Japanese style, and the fact that it was an animated film.
The challenge for the animation part was how to incorporate Otagaki’s characters into the CG animation. It was designed to give a sense of three-dimensionality and realistic skeletal structure and muscles, and they thought about how to depict the devilish expressions and sweat, which is a manga-like symbol, in a hard-boiled sci-fi world.
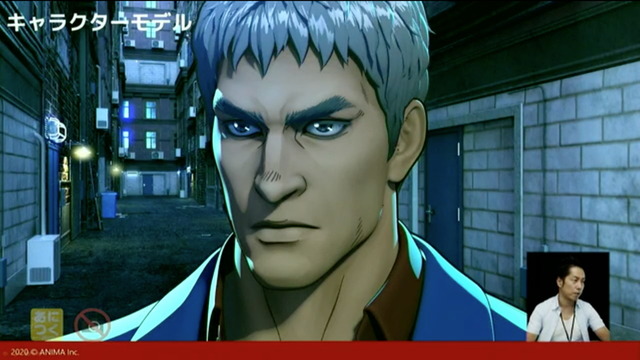
The actual character models were finished with shaded textures and thick outlines. The lighting was also going to be elaborate, so it was important to keep the amount of information to maintain anatomical accuracy and a touch of manga style.
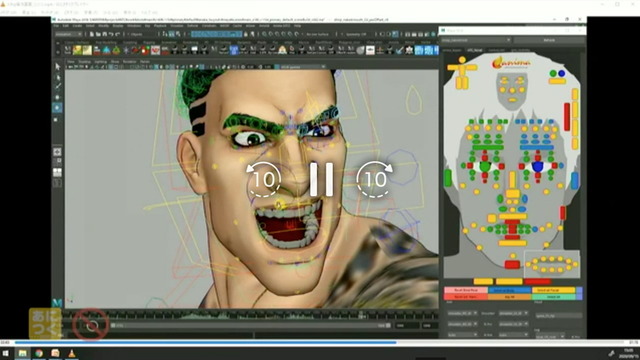
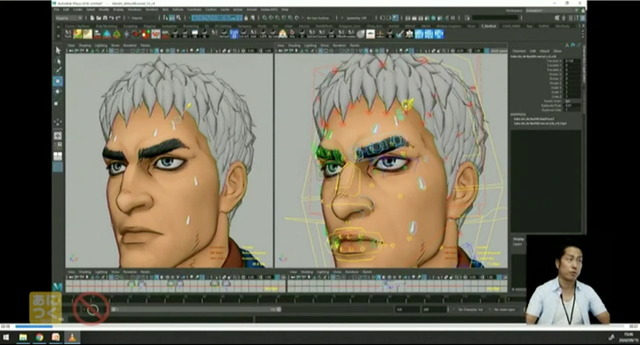
Next, Tanaka explained the facial rig for this work. Rather than the traditional “blend shape-based” control that mixes premade shapes, he used a controller that moves the bones and muscles, and this work also uses motion capture for animation. However, in order to make the most of Otagaki’s uncanny facial expressions, the animators were able to move the facial muscles with the controller and create expressions at will.
This facial rig allows the animator to manipulate the muscles to create wrinkles on the face and even sweat. It is possible to control facial expressions similar to those of real people. On top of that, the wrinkles and sweat are used to recreate Otagaki’s character in an anime style.
I will explain how adding wrinkles and sweat to the facial expressions enrich the emotional expression by comparing it to the image before the wrinkles were added.
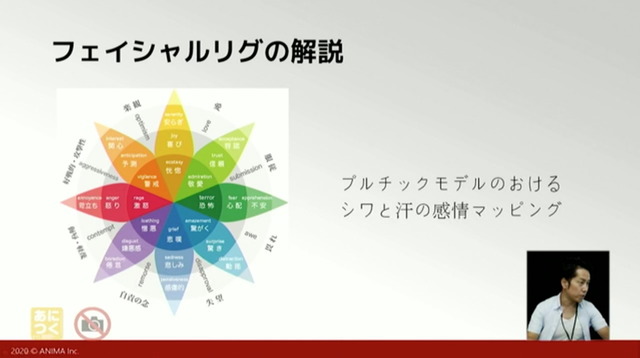
In creating this work, they prepared a table called “Plutchik Model” that maps the combination of wrinkles and sweat emotions. This is a table of what emotions can be expressed by the intensity of wrinkles and the amount of sweat.
He also made a chart of emotions for all shots and distributed it to the animators.
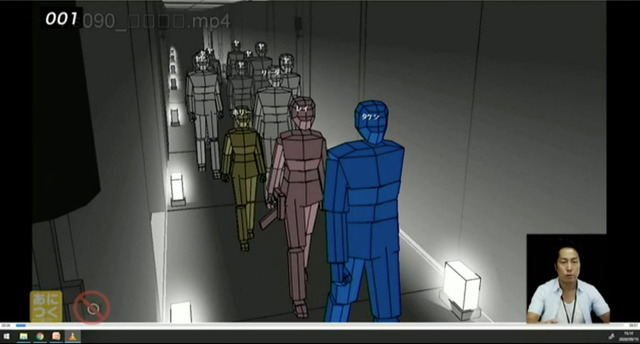
This was followed by an explanation of the animation style. For this work, he chose the method of creating pre-visualization and brushing up the action plan. In line with the world view of this work, he kept the excessive poses and bluff of anime to a minimum, as they might destroy the world view.
Also, by creating the pre-visualization for the action scenes, the motion actors were able to easily visualize the movements and envision the overall scale and camera work.
Miyama introduced the visuals of this work.
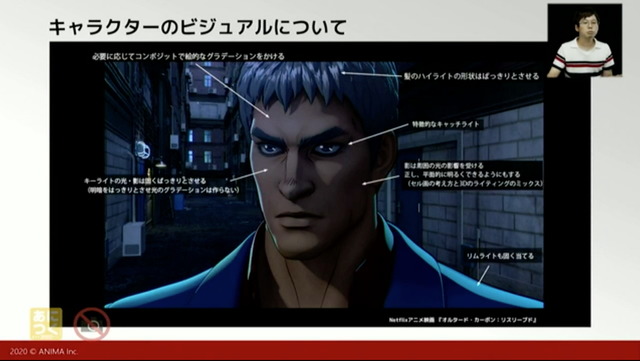
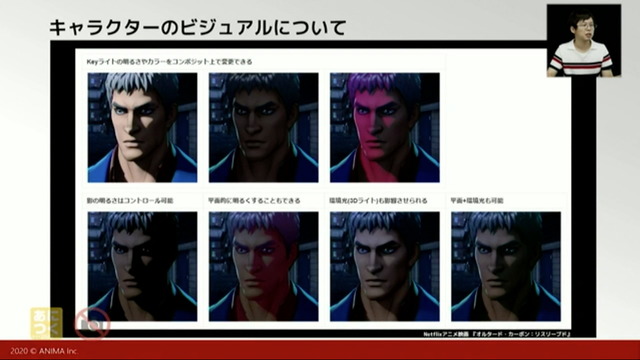
First, let’s talk about the visuals of the characters. He showed images of the main character designs with detailed instructions for gradation, hair highlights, key light and rim light styles, etc., and explained in detail the attention to detail of the visuals in this work.
He said that the three most important elements for making 3DCG look like animation are “making the key lights and shadows hard and clear,” “hitting the rim light hard,” and “adding outlines.”
He said that he had spent the most time on how to express the shadows, and the saltiness of how much ambient light is received is important in creating an animated look in 3D.
Although it is easy to express rich 3D shading by adding shadows that are greatly affected by ambient light, it is closer to traditional celluloid animation if the effect of ambient light shading is reduced.
In the end, they were able to incorporate both 3D and 2D ideas by being able to offset 2D brightness while being affected by the light of the 3D environment.
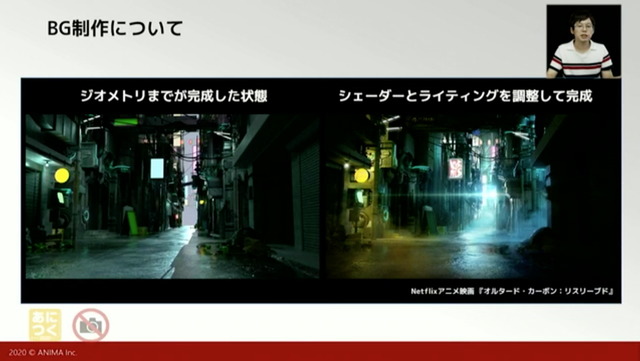
For the background, they had an outside company create the geometry, and adjusted the shaders and lighting in-house.
The backdrop scene in the alleyway shown as an example used to take about an hour per frame to render in the beginning, but they were able to reduce it to about 20 minutes through in-house optimization.
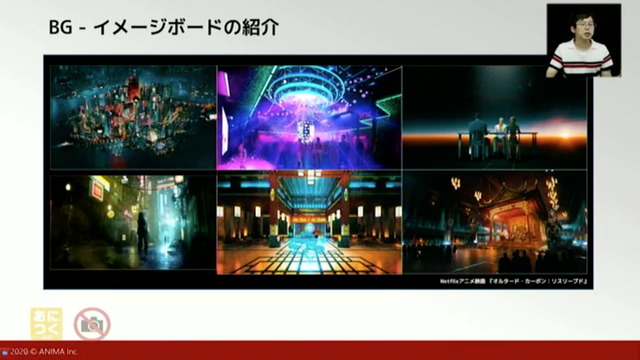
The imageboard for the background that defines the world of the work was then introduced, showing the unique worldview of the fusion of science fiction and the world of the Japanese yakuza.
Colors used are basically warm, but there are also some cold blue colors used in some places, and they worked out which colors to use more as the story develops.
The total length of the film was 72 minutes, with 1058 shots, and three months of shot work. Of these, Anima was in charge of 747 shots.
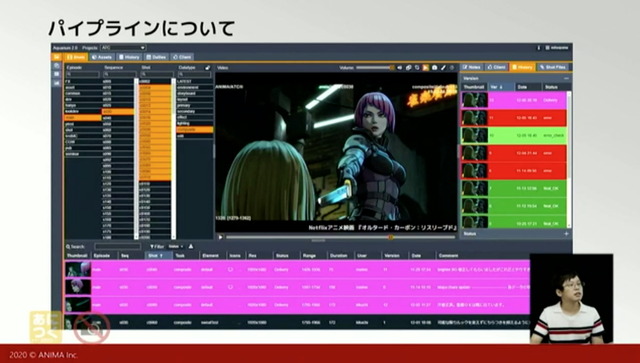
Anima is using an in-house viewer pipeline called Aquarium to manage the work status. It runs in a browser and allows users to write feedback with comments, making it easy to manage the progress of each status.
The database can also be viewed, and the assets required for each shot can be listed.
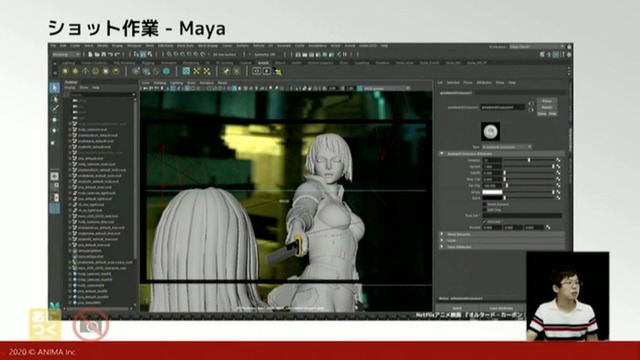
For the shots, I use Maya and Nuke to create camera positions and camera work, make fine adjustments to the automatic lighting settings, add camera shake if necessary for production purposes, and make detailed color adjustments.
[Anime! Anime! Biz / article reprinted from animeanime.biz]


